
Wednesday, August 19, 2009
The skin is finally back on!

View through front window
Friday, August 7, 2009
Lots of work ahead
floor board repair
Thursday, July 23, 2009
This video shows this weeks progress
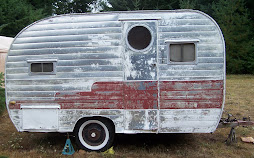
Like all worthy projects, this one just keeps getting layers and layers deeper. The things I learned this week that I should pass on to those of you taking on a project like this:
Buy a small neumatic cutter (grinder) - It will save you hours trying to fight screws that are full of paint or rusted over. Cut right down the middle of the head of the screws and use a fat flat screwdriver to back them out.
Figure how much time each section of your project will take and write it down. Now throw it out, it is useless. So many things will unexpectedly show up that need doing. You will have to decide what level of repair you want to achieve and it always seems to end up " Well you've gone this far, why not do it right". Which translates into - trips to the hardware store, more planning and usually several new projects.
Next, the top step of the ladder is "not a step" - believe it.
Save all the material you are removing and label it. That will help you when you are fabricating the new pieces. I don't know how many times I have looked at a piece of wood and wondered where that came from.
Mark all the pieces that fit together. For example: draw an x that covers all the sections of a multiple junction before you separate them so you will know how they go back together later.
Use a lawn chair. This is critical. You must sit and think through the steps ahead of time. You don't want to make things harder than they have to be.
Get current on your tetanus shots.
Friday, July 10, 2009
The work begins
I don't expect to make my mind up on this issue until the structural rebuild is completed.
Tuesday, July 7, 2009
The first step
The little kitchen cabinet was iffy, there was some dry rot and shabby repairs. There was obvious water damage behind the cabinet. I decided to remove and discard the cabinet entirely and make a complete rebuild ( I regret that now. I should have salvaged what I could - Always save everything until there is no doubt you should won't reuse it).
I removed all the new construction for the back bed, tore out the old carpet and the damaged paneling.
After that I knew I needed something for inspiration so I pressure washed the old latex off the exterior and I was thrilled with what was under it (always use caution with a pressure washer. You don't want to damaged the thin aluminum and/or force water in the trailer).
How it all got started.
It was full of clutter and had flat tires. The side yard was fenced in and trees and rose bushes had been planted between it and the road.
I was able to talk the guy down to $300 and he changed the tire for me, moved his wood pile, took down his fence, cut back trees and removed rose bushes so I could extract it.
When I first saw the trailer, although it was rough for sure, I was very very excited and had a hard time keeping my composure. I'd been looking for a classic trailer like this for a very long time.